Category Archives: Short Tutorials

In this part of our website, we give fast and free advice that you can implement right away.

Search Network Display Expansion Option in Google Ads. Be Cautious!

Note: A video recording of this lesson is available as a reel on our Facebook page that can be accessed via this link.

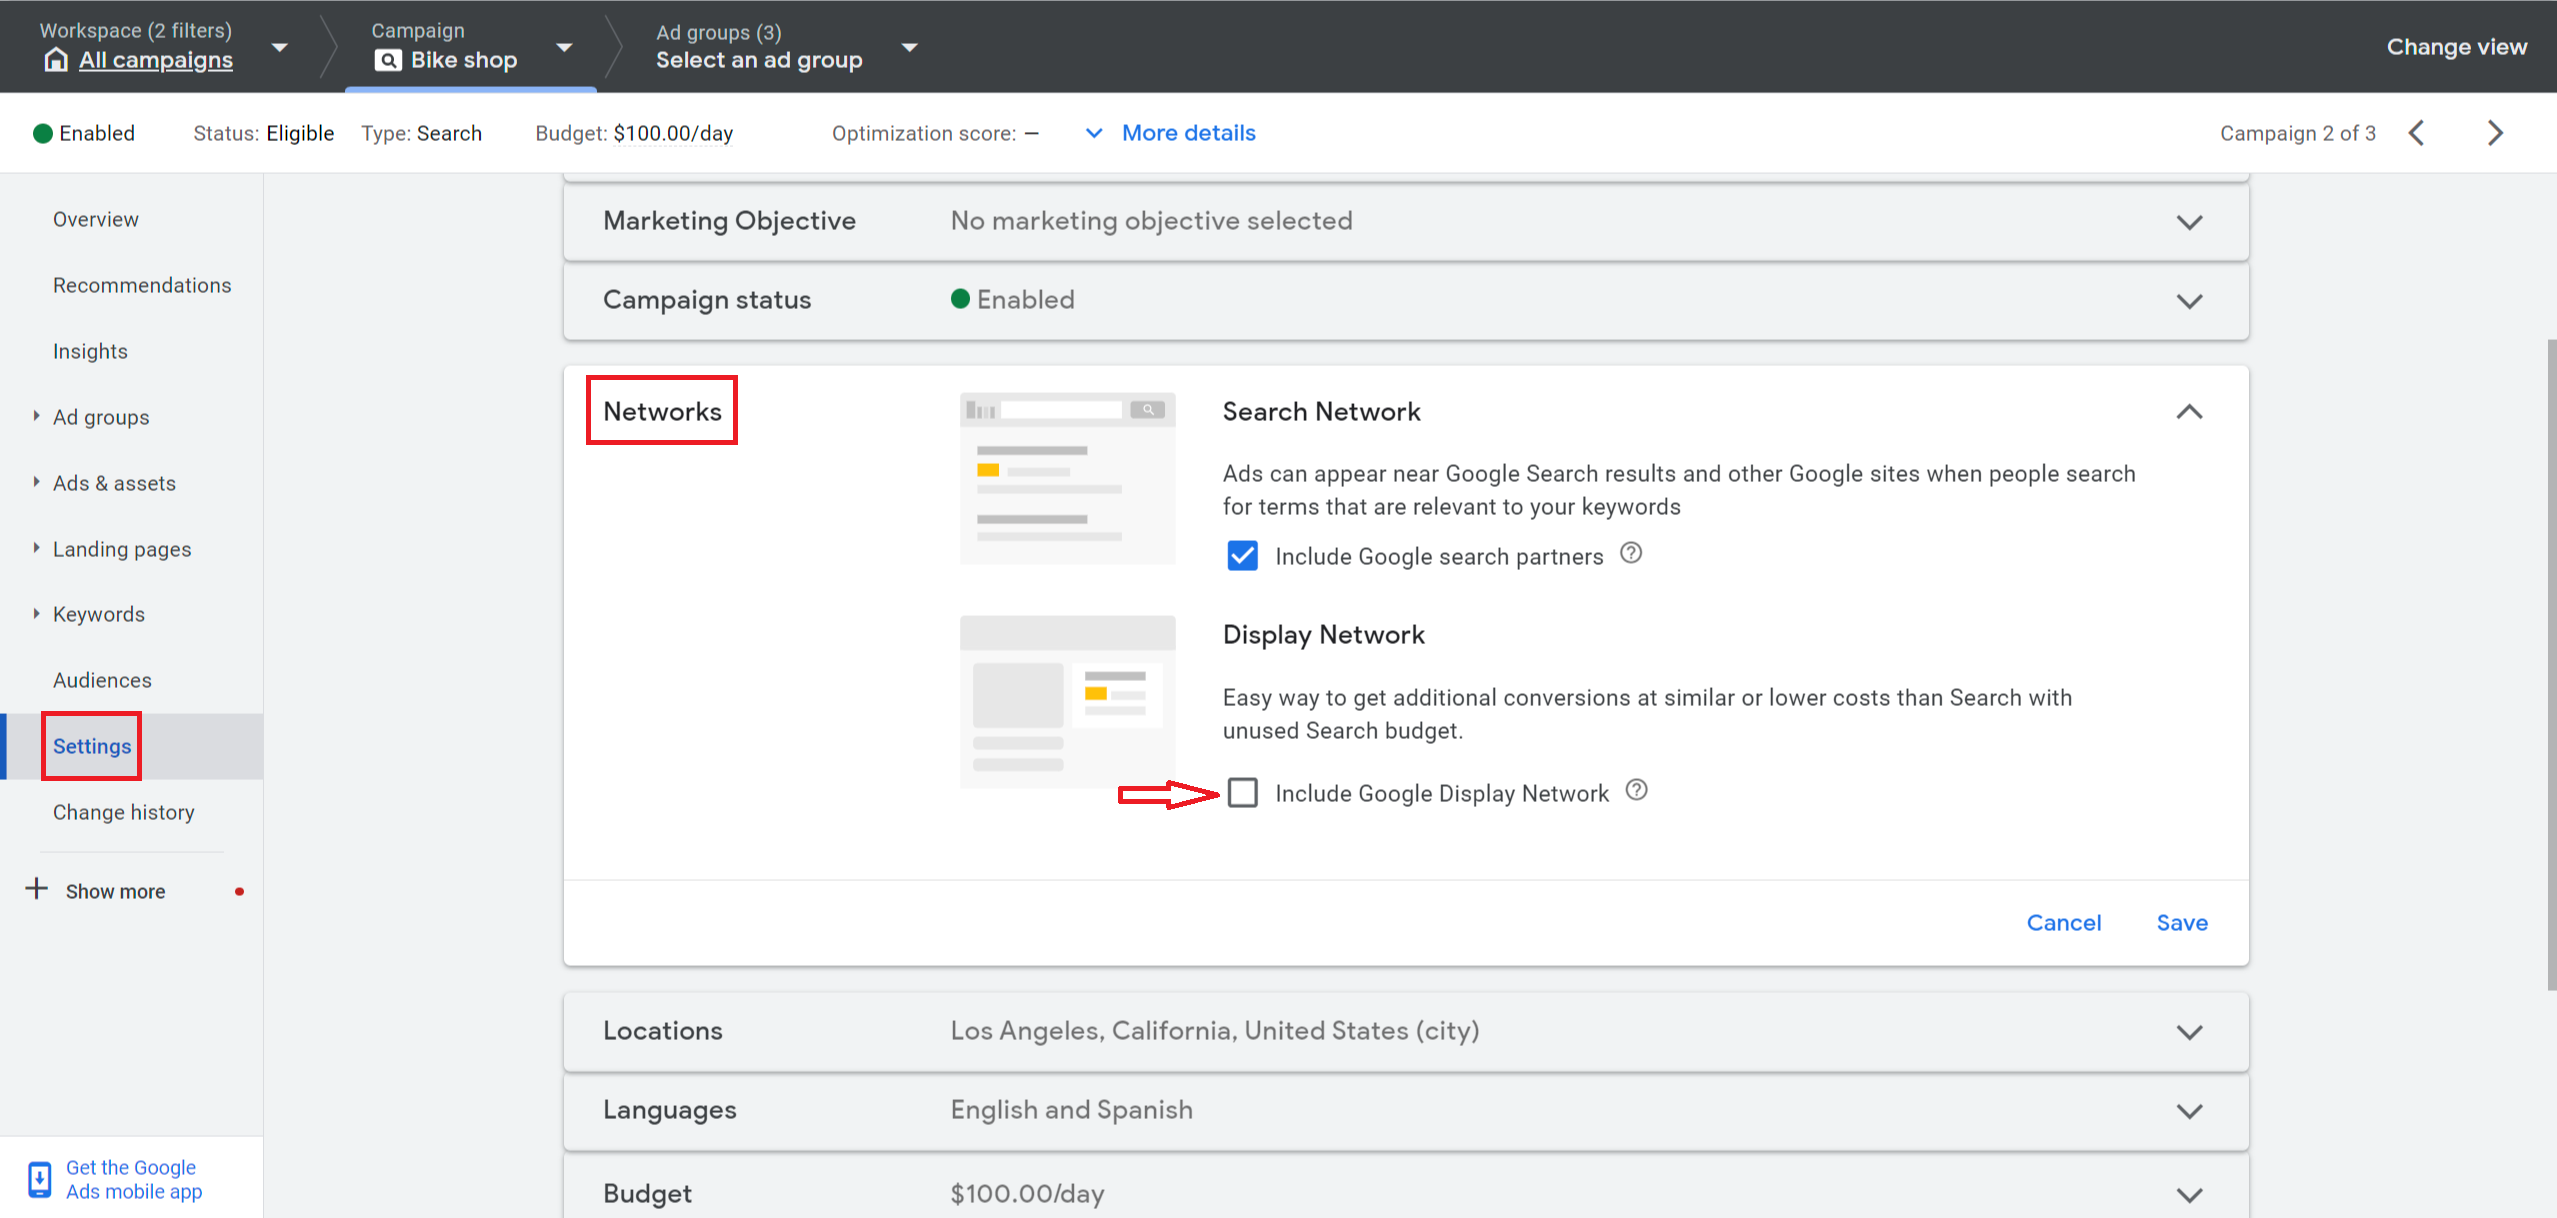
Google officially calls it Display expansion on search campaigns and you can find it in the settings of your search campaign when opening up the Networks tab. As you can see, it is listed as the second option there and it says Include Google Display Network.

Obviously, Google claims that by enabling this feature you will be able to get around 15% more conversions at a similar cost by spending your unspent budget.

Although it is true that this setting will only get activated when the system has troubles spending your daily budget with the help of the search keywords that you have added to your campaign yourself, I really do not recommend you use this feature because in real life situations, it will probably waste the rest of your budget on some display traffic of bad quality.

Obviously, you won’t even be able to see the keywords that the system has used to generate those clicks because targeting on the display network differs from the targeting on the search network.

If you’re interested in the display network, I highly recommend you create a separate campaign for this.

Additional tip regarding reporting:

By the way, if you want to see the number of clicks that you’ve already received from the display expansion, you can do so by segmenting the data at the keyword, ad group or ads & assets level.

In order to see the stats that will probably disappoint you, you need to click on the Segment icon that you can find in the middle of your screen (towards the right side) and then choose Network (with search partners).

Stay tuned for my next short Google Ads video lessons as I’m planning to share more short but useful content like this.

 

Google Ads Location Options. Choose a Correct Setup.

Note: A video recording of this lesson is available as a reel on our Facebook page that can be accessed via this link.

Another important Google Ads feature that can show your ads to irrelevant people and, obviously, waste your advertising budget. This time I’m talking about the location options that you can find in the main settings of your campaign.

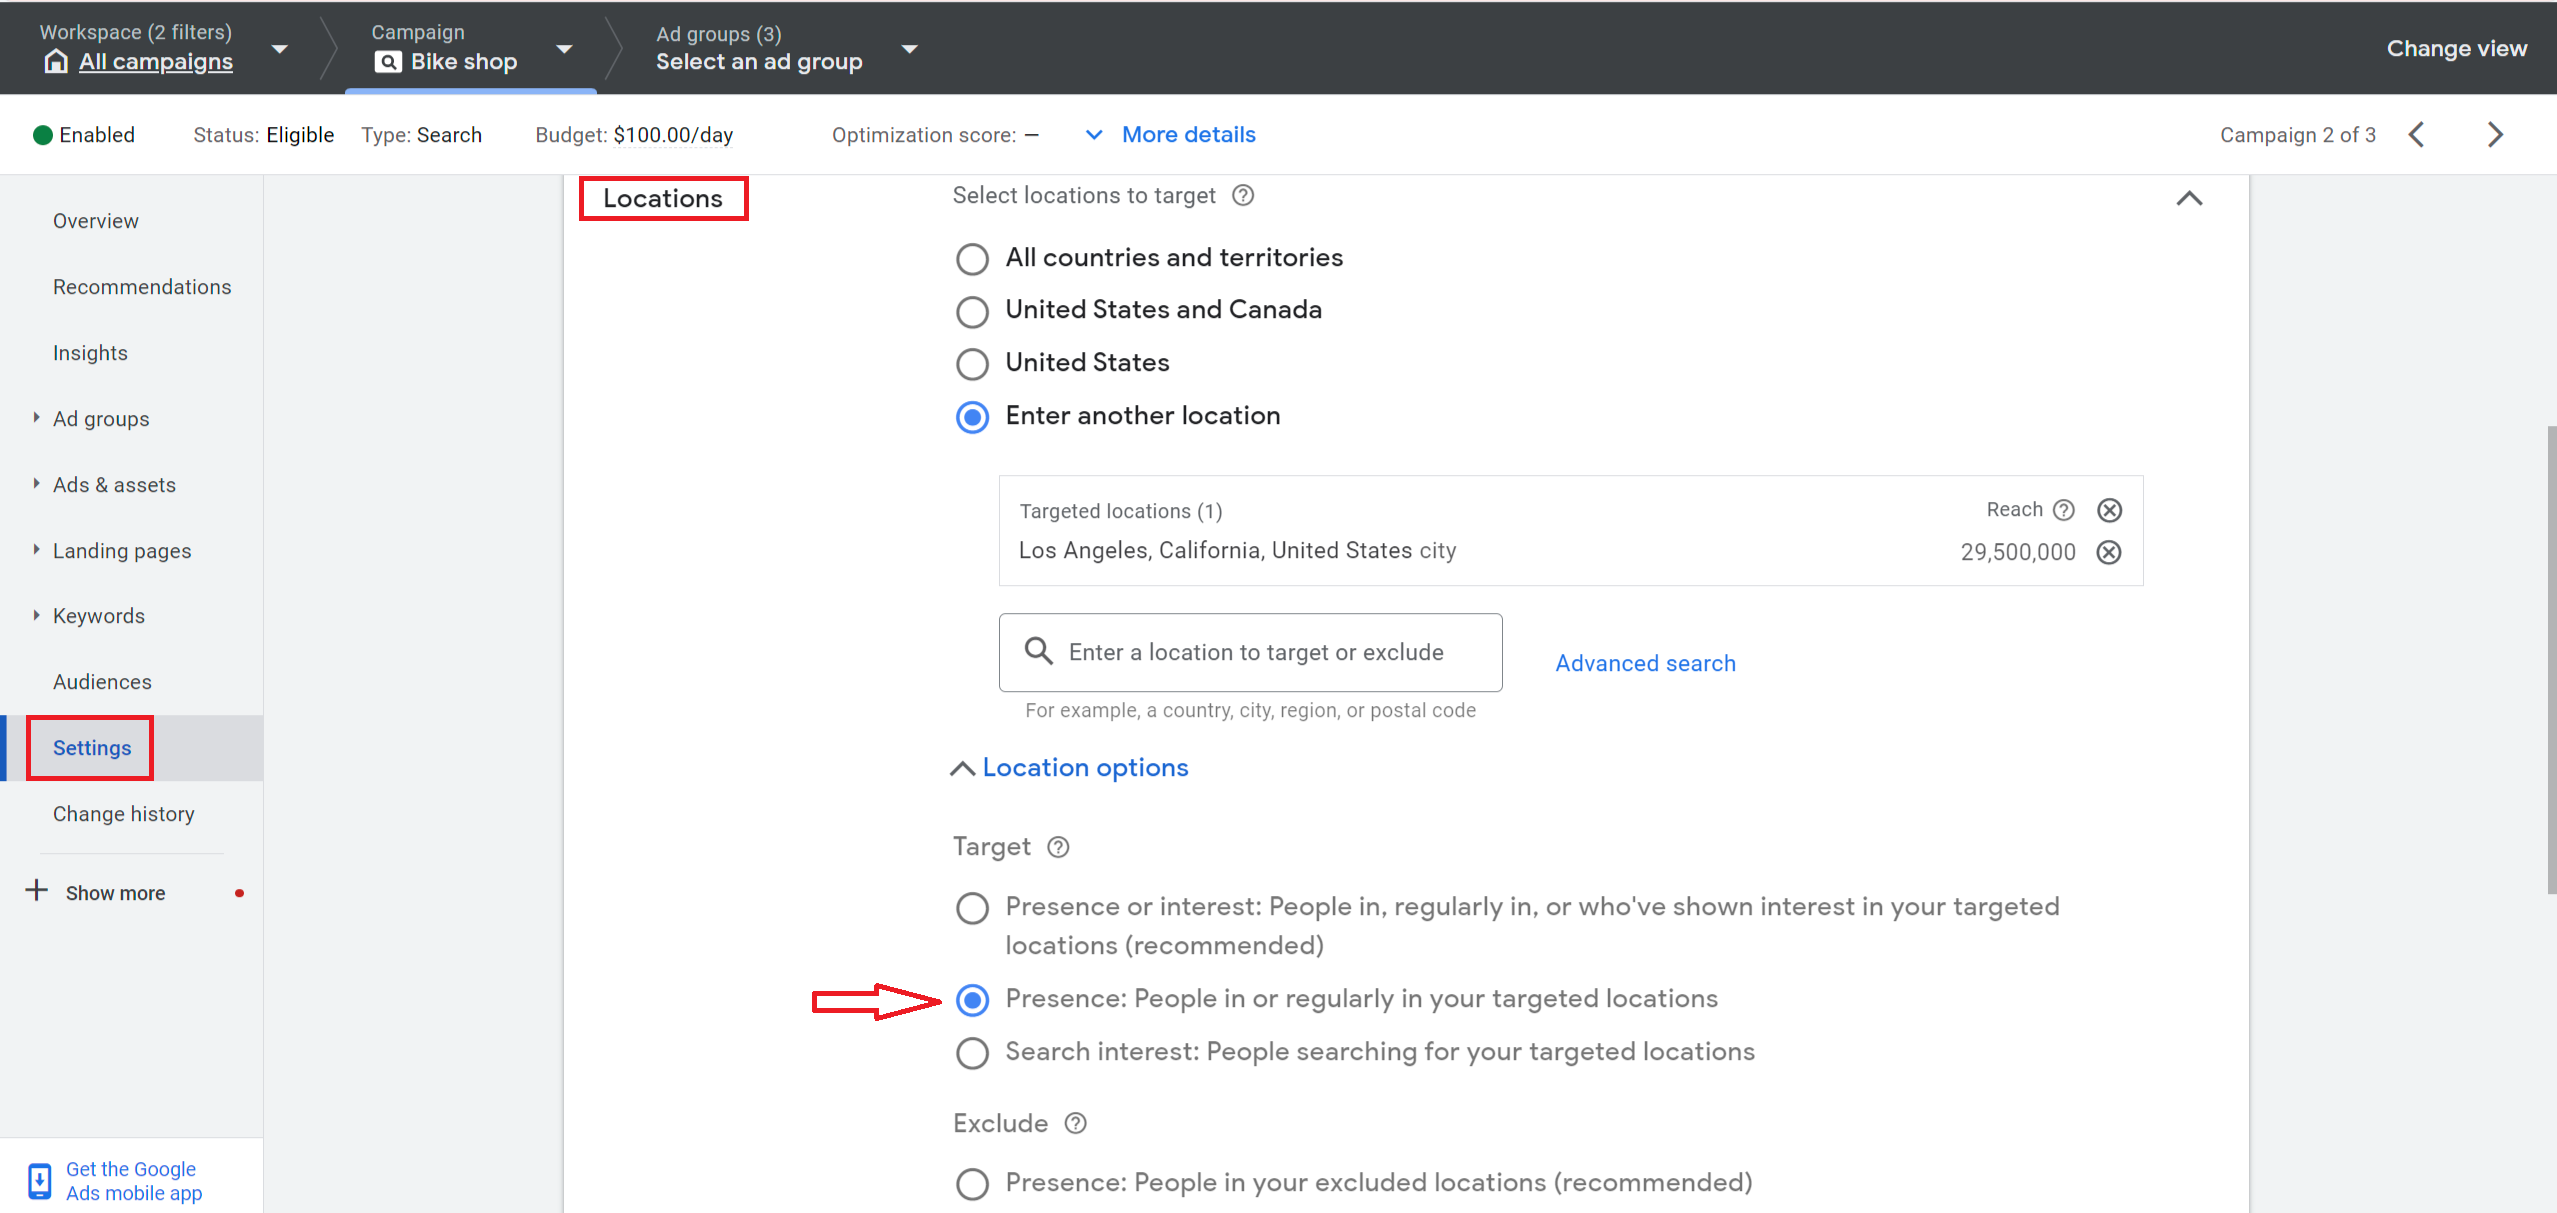
It’s pretty easy to select your targeted locations in the Locations tab, however, many people don’t pay proper attention to the additional location settings that are kind of hidden below the main settings. In order to open them up you need to click on the blue link that says Location options.

By default, the system helps to increase your reach and targets both users who are physically located in your chosen cities, states or countries and also those who have just shown interest in the locations that you have added.

In other words, these people can be located anywhere in the world and in many cases, you really don’t need it.

To sum it up, in case your business model implies showing ads to people who are really physically located in your targeted locations, make sure your edit the settings and select the second option that says Presence: People in or regularly in your targeted locations.

Additional tip regarding reporting:

By the way, if you want to take a look if your campaign has already served in some irrelevant locations, unfortunately, you won’t be able to do this in the main part of the interface by selecting your campaign and then opening up the Locations tab. (not Settings that we’ve talked about before).

Location report in Google Ads

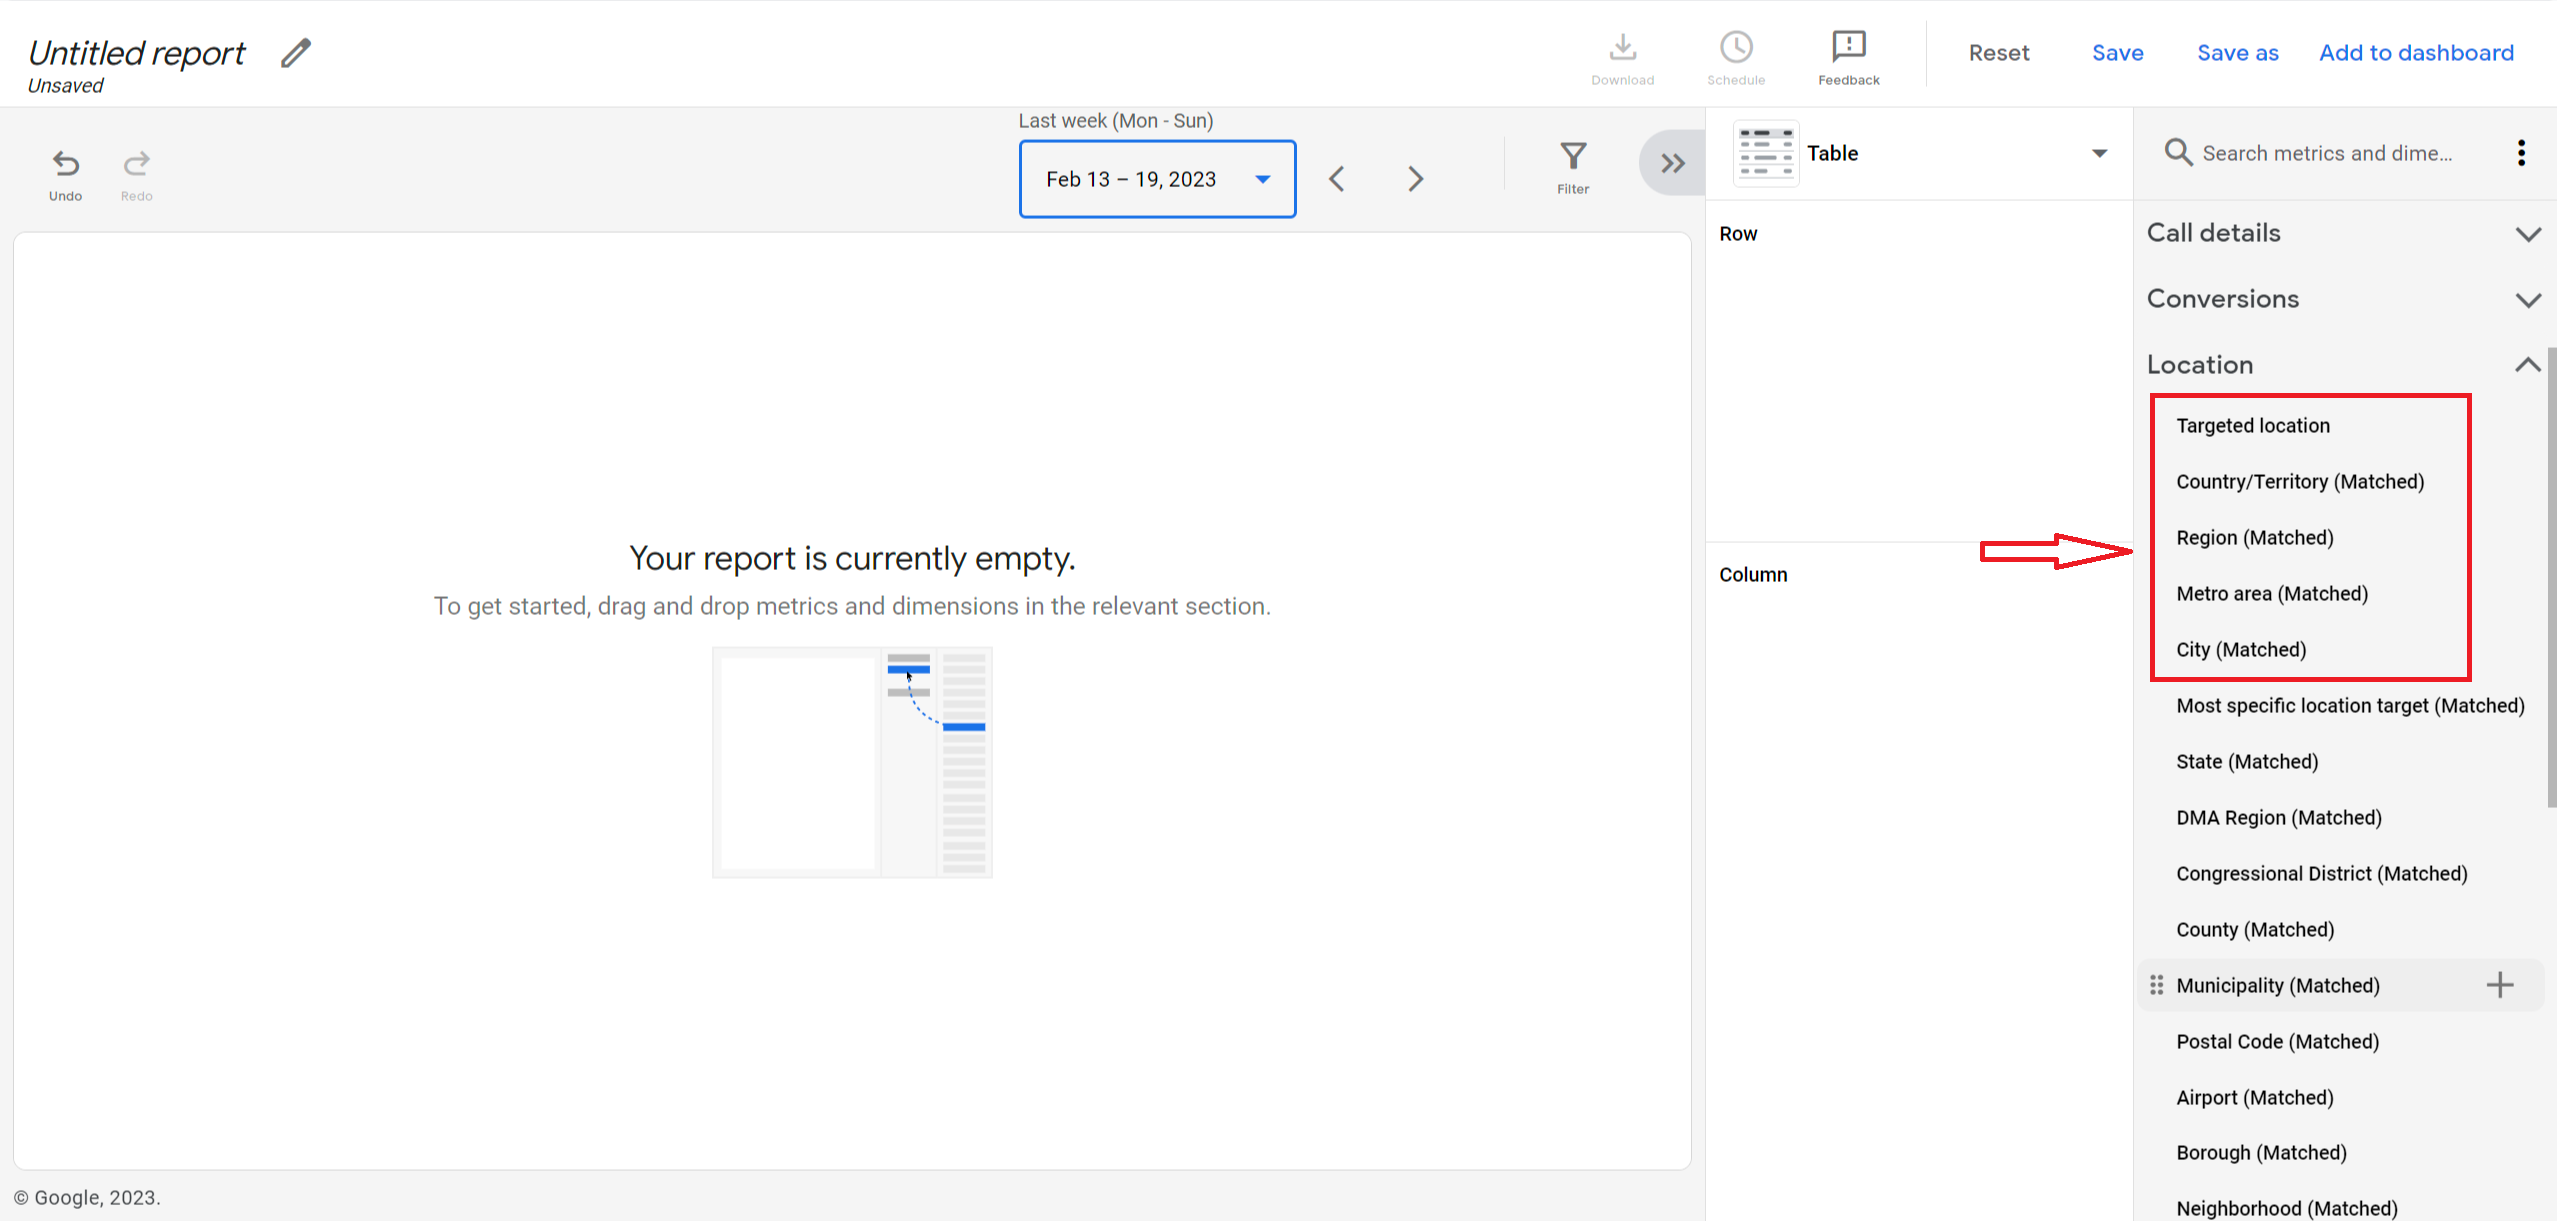
It’s a pretty wise trick from Google to show there only locations that you’ve really specified in your campaign. In order to see the full picture you will need to enter Reports (there is an icon at the top of your screen) and create a custom report by adding the relevant columns such as Country/territory, Region, City.